
Teaching a Tiny Light to Breathe Arduino LED Blink Project
A beginner-friendly project to understand how hardware and software interact. Control an external LED using Arduino code and breadboard circuitry.
Overview
Introduction (Why This Project Matters) Every engineer starts somewhere. Some start with complex machines. Some start with robots. But many great innovators begin with a simple blinking LED. This project is not just about turning a light ON and OFF. It is about: - Understanding how hardware and software talk to each other - Learning the basics of electronics - Building confidence in embedded systems - Taking the first step into robotics and IoT In this project, we taught a small 5mm LED how to “blink” using an Arduino Uno. This simple action represents the foundation of smart systems.
Key Features
- Learn how to control electronic components using Arduino
- Understand digital output pins
- Practice circuit building on a breadboard
- Write and upload basic Arduino code
- Develop problem-solving skills
Schematics

Official Project Schematic
Figure 1: led blink schematic. This schematic shows the exact electrical connections between Arduino Uno, resistor, and LED for accurate implementation.
Code Repository
1int ledPin = 8;
2
3void setup() {
4  pinMode(ledPin, OUTPUT);
5}
6
7void loop() {
8  digitalWrite(ledPin, HIGH); // LED ON
9  delay(1000);               // Wait 1 second
10
11  digitalWrite(ledPin, LOW);  // LED OFF
12  delay(1000);               // Wait 1 second
13}
Step-by-Step Guide
Working Principle
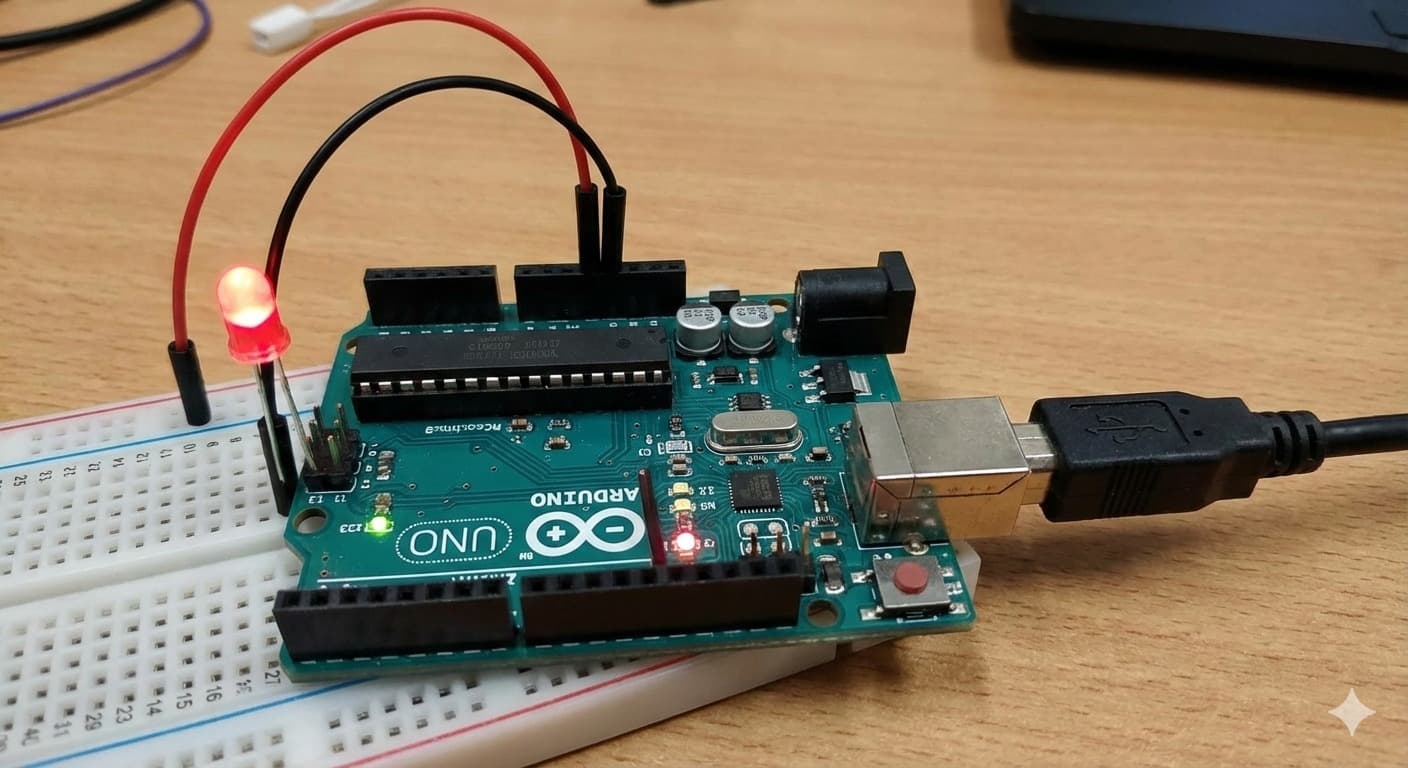
The Arduino sends 5V signal from pin 8. This signal passes through a resistor. The resistor limits current. The LED lights up. When the signal stops, the LED turns off. This cycle repeats continuously.
Process Flow
- Code → Signal → Electricity → Light → Repeat
Observations & Results
Common Mistakes
LED not glowing
Wrong polarity
Reverse LED legs
No blinking
Wrong pin
Check pin number
LED damaged
No resistor
Always use resistor
Upload error
Driver issue
Reinstall Arduino drivers
Safety Guidelines
Always disconnect power before changing wiring
Safety First
Never connect LED directly to 5V
Prevents burning out
Avoid short circuits
Protects components
Handle components carefully
Delicate parts
Use correct resistor values
Ensures proper current
Learning Outcomes
- Basic electronics
- Microcontroller programming
- Circuit design
- Debugging skills
- Embedded system fundamentals
Future Improvements
Multiple LED patterns
Blinking in sequences
Traffic light system
Simulation
RGB LED control
Color mixing
Button-controlled blinking
Interaction
Smart home indicators
IoT application
Human Touch: Our Philosophy
"This LED may be small. But behind it is curiosity. Practice. Failure. Retry. Learning. Growth. Every blink represents a step forward. From a small light to smart machines. This is how innovation begins."
Contact & Collaboration
Components (BOM)
- Arduino UnoThe brain of the system. It runs the program and controls the LED.x1
- BreadboardAllows us to connect components without soldering.x1
- 5mm LEDActs as the output device. It visually shows the result of our code.x1
- 220Ω ResistorPrevents the LED from burning by limiting current.x1
- Jumper Wires (Male-Male)Carry signals and power between components.x3–4
- USB CableProgramming & powerx1
- Computer/LaptopCoding & uploadingx1